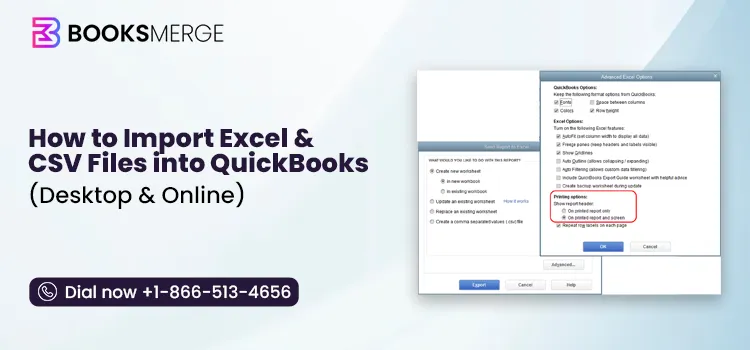
Moving financial data into QuickBooks doesn’t have to mean entering hundreds of rows by hand. If your transactions, customer details, or other records are already stored in an Excel or CSV file, you can import much of that data directly into QuickBooks.
The process differs slightly between QuickBooks Desktop and QuickBooks Online, and choosing the right file format or import option can make a big difference. A poorly formatted spreadsheet can lead to missing information, incorrect entries, or import errors that take longer to fix than the original data entry.
In this guide, we’ll walk you through how to import Excel and CSV files into QuickBooks, covering both Desktop and Online versions, along with the file requirements and practical tips to help you get the import right the first time.
Yes, you can import Excel and CSV files into QuickBooks, but the right route depends on what is inside the spreadsheet. Lists such as customers and items take one road, while bank and credit card transactions take another. QuickBooks Desktop has three separate import paths, QuickBooks Online has its Import Data wizard plus a bank upload screen, and Desktop Enterprise follows the Desktop steps. This guide helps you pick the right door the first time.
Find what you are importing, then follow the matching route to import Excel and CSV files into QuickBooks the right way.
| What are you importing? | QuickBooks Online | QuickBooks Desktop (Pro, Premier, Enterprise) |
|---|---|---|
| Customers, vendors, items, chart of accounts | Settings > Import data (Excel, CSV, or Google Sheets) | Path 1:File > Utilities > Import > Excel Files, or Add/Edit Multiple List Entries |
| Invoices, bills, checks, journal entries | Settings > Import data (some types need a higher plan) | IIF file, or Advanced Import for supported lists |
| Bank and credit card transactions | Link account > Upload from file (CSV, QBO or QFX) | Path 2: Web Connect (.qbo). Path 3: Direct CSV upload, only if your release offers it |
Match the file type to the job before you open QuickBooks.
| File type | Best for | Works in |
|---|---|---|
| Excel (.xlsx / .xls) | List data: customers, vendors, items, chart of accounts | Desktop and Online |
| CSV (.csv) | Lists in both products, and bank or credit card transactions in Online | Desktop (lists) and Online (lists and bank data) |
| IIF (.iif) | Complex transactional data and cross-platform migration | Desktop only |
| QBO / Web Connect (.qbo) | Bank and credit card transactions | Desktop and Online |
IIF stands for Intuit Interchange Format. It is a plain-text, tab-separated file QuickBooks Desktop reads to move lists and transactions between company files or programs. It is powerful but unforgiving, so one misplaced tab can break the import. Reach for it only when a standard Excel import can’t handle your data, and test it on a backup copy first.
Before importing a large number of records, create a backup of your QuickBooks company file. A backup gives you a recovery point if the import creates duplicate entries, changes existing information, or produces unexpected results. Follow our guide on how to back up your QuickBooks company file before proceeding with the import.
Desktop has three ways to import Excel and CSV files into QuickBooks as list data. They are alternatives, not steps in one sequence, so pick one. (Bank files are a different route, covered further down.) Whichever you choose, back up your company file first, because Desktop has no native undo.
Path 1 for lists: File > Utilities > Import > Excel Files
Intuit’s Excel import lets you import an Excel file in QuickBooks Desktop for customers, vendors, items, and the chart of accounts. If you build your chart of accounts first, use the same spelling and capitalization as your spreadsheet.
Use this to import Excel files into QuickBooks Desktop when you have a tidy list and want QuickBooks to match your headers automatically.
VERDICT: Use Standard Import for a one-time list upload. Save Advanced Import for anything with custom fields or recurring imports.
Choose this to import CSV files into QuickBooks Desktop when the headers don’t line up, or when you will repeat the same import. It lets you map each field yourself and save the mapping as a template.
Menu labels can vary slightly between releases, so follow the on-screen wording if it differs.
Real-life example: Kevin runs a distribution company with 2,000 inventory items and spreadsheet columns named in his supplier’s style. He maps each column once in Advanced Import, saves the template, and reuses it every quarter when new items arrive.
VERDICT: If your columns have custom names or you import the same way monthly, build one saved mapping and reuse it.
This copy-and-paste grid works like a spreadsheet inside QuickBooks, which makes it ideal for small additions or edits.
VERDICT: Use Add/Edit Multiple List Entries to paste a few dozen rows or fix existing records. Switch to Standard Import when you have a file to upload.
QuickBooks Online uses one wizard for most lists and general data, and it has strict preparation rules, so prepare your sheet before you open it:
To import CSV files into QuickBooks Online, or to import an Excel file into QuickBooks Online (the wizard also accepts .xlsx/.xls and Google Sheets), follow the wizard below.
Order matters. Import your lists first (chart of accounts, then customers, then vendors, then products and services), and then your transactions in any order. The wizard imports only the fields in its sample file, so extra columns are ignored. Intuit says importing bills is limited to Advanced and higher plans in the US.
Heads up: Bank and credit card files do not go through the list-import tools above. They use a different menu path in both products, so keep them separate.
Keep amount columns free of currency symbols and commas, and filter out dates QuickBooks already has to avoid duplicates.
Path 2 is the traditional method, and Path 3 depends on your version. Don’t mix them with the list import.
Path 2: Web Connect (.qbo). This is the standard way to bring bank and credit card transactions into Desktop.
File > Utilities > Import > Web Connect Files (or Banking > Bank Feeds > Import Web Connect Files)
Path 3: direct CSV upload (check your release). Some newer Desktop releases may offer a file-upload option in the Banking Center that accepts a three-column CSV: Date, Description, and Amount. This is a separate path from both the list import and Web Connect. Intuit’s own community answers say Desktop doesn’t upload bank CSVs in some releases, so if you don’t see the option, use Web Connect instead.
Want a hand with a larger move from spreadsheets or another system? Our QuickBooks desktop to Online covers it.
Searches like “Can I convert CSV to QBO?” run into a naming quirk because QBO means two different things:
| Meaning of “QBO” | What it is |
|---|---|
| QuickBooks Online | The cloud product, often shortened to QBO. |
| .qbo file | QuickBooks’ bank-transaction file format (Web Connect), based on OFX. Banks provide it for downloads. |
When someone asks whether they can convert a CSV to QBO, they almost always mean the file format. QuickBooks doesn’t convert a CSV into a .qbo file natively. If you specifically need a Web Connect file, you would need a third-party converter to create one. In most cases, you can skip that step: QuickBooks Online imports a CSV directly through Upload from file, as covered above. In Desktop, a .qbo file goes in through File > Utilities > Import > Web Connect Files.
Real-life example: Ravi, a contractor on QuickBooks Online, spent an hour searching for a CSV-to-QBO converter. He didn’t need one. Uploading his CSV directly through Upload from file did the same job in minutes.
One more distinction: QuickBooks can’t turn a CSV or Excel file into a company file (.QBW). You import data into an existing company file instead of creating one from a spreadsheet.
Not everything in your spreadsheet has a home in QuickBooks. Here is the split.
| You can import | You can’t import |
|---|---|
| Customers, vendors, items, chart of accounts | Payroll records |
| Invoices and sales receipts | Sales orders |
| Bills, checks and expenses | Invoice and other custom templates |
| Payments and credit card charges | Memorized or recurring transactions |
| Deposits and money transfers | Budgets |
| Journal entries | Attachments |
| Bank transactions (via the right path) | The audit trail and reconciliation reports |
Anything on the right-hand side has to be set up or re-entered inside QuickBooks. Exact support varies by product and plan: Intuit’s Online list, for example, includes estimates and purchase orders, so check the sample files in your own account. Online also won’t import sub-accounts through the contact import, and each contact supports only one email address.
Importing an Excel or CSV file is different from converting an entire accounting dataset. Spreadsheet imports are useful when you need to add selected records, such as customers, vendors, products, or supported transactions, to an existing company file. A full data conversion may require a broader review of account balances, transaction history, lists, and other records. If you are moving information from another accounting system or restructuring an existing QuickBooks file, review our QuickBooks data conversion guide before deciding which method to use.
Good news if you run Enterprise: you can import a CSV file into QuickBooks Enterprise using the same Excel Files import, Advanced Import, and Add/Edit Multiple List Entries described above.
The menu paths match Pro and Premier. Enterprise files are usually larger, so a saved mapping template and a backup before every import matter even more.
Verify in a live Enterprise file: whether list-size limits or Advanced Inventory field mappings differ from Pro/Premier, and add one line if they do.
If the import options described in this guide do not appear in your installation, check which QuickBooks Desktop release you are using and whether its available features match the instructions. You can also review our guide on how to update QuickBooks Desktop before continuing. Menu differences alone do not necessarily mean that an update will resolve the problem.
Prep is half the job. Before you import Excel and CSV files into QuickBooks, run through this checklist.
Need help cleaning data or planning a bigger migration? See our data migration service .
After importing a spreadsheet, compare the number of imported records with the original file and review several entries for accuracy. Check customer and vendor names, dates, account assignments, opening balances, and transaction amounts as applicable. If you imported financial transactions, compare the relevant account totals and reports with your source records. If the results are incorrect, investigate the field mapping and import settings before repeating the process, because importing the same records again may create duplicates. For additional protection before making corrections, keep a backup of your QuickBooks company file.
When you import Excel and CSV files into QuickBooks and the import fails, start with the spreadsheet. Most failures are formatting problems, so these are the first things to check.
| What you see | Likely cause | Fix |
|---|---|---|
| Columns won’t match, or rows are skipped | Missing or duplicate header row | Use one header row at the top and no blank header cells. |
| Dates rejected or shifted | Invalid or mixed date format | Use one format, such as MM/DD/YYYY, in every row and match it in the import screen. |
| Garbled names or import stops | Special characters or wrong encoding | Remove stray symbols; save the CSV as UTF-8. |
| “Duplicate” or “already exists” errors | Duplicate reference numbers or names | Make each invoice number or name unique. |
| Amounts rejected | Currency symbols or commas in the amount column | Strip symbols and use plain numbers. |
| Bank upload fails | Wrong column count | Use exactly Date, Description, Amount (or Date, Description, Credit, Debit). |
| Can’t open or access the file | File open in another program | Close Excel, save a copy, then import again. |
Last resort only: If your spreadsheet is correctly formatted but QuickBooks continues to behave unexpectedly, investigate whether the problem is related to the company file or the application itself. The QuickBooks Tool Hub troubleshooting tools can help diagnose certain Desktop issues, while QuickBooks File Doctor is designed for supported company-file and network problems. These tools will not correct mismatched spreadsheet columns or invalid CSV data, so resolve import-formatting issues first.
To import Excel and CSV files into QuickBooks without surprises, match your data type (list or transaction) and file format (Excel, CSV, or IIF) to the right method above, back up first, and verify the results afterward. Keep the three Desktop paths separate, remember that “QBO” can mean the product or the file, and use the Online wizard for lists and the bank upload for statements. Stuck on a stubborn import? Call BooksMerge QuickBooks support at +1-866-513-4656, or see our guide on QuickBooks chat options.

Yes, both QuickBooks Desktop and QuickBooks Online accept Excel files natively for list data such as customers, vendors, and items, with no third-party converter required. You can import Excel and CSV files into QuickBooks as long as the columns, dates, and names are clean.
You can’t import payroll records, sales orders, invoices, other custom templates, memorized or recurring transactions, budgets, attachments, the audit trail, or reconciliation reports. Those items must be set up or re-entered inside QuickBooks. Sub-accounts also can’t come in through the Online contact import, so import them as parent accounts first.
QuickBooks doesn’t natively convert a CSV to the .qbo Web Connect file format. For most needs, importing the CSV directly through QuickBooks Online’s bank-transaction upload accomplishes the same result without that extra conversion step. QuickBooks Desktop needs a .qbo file for bank transactions, so Desktop users who only have a CSV would need a third-party converter.
QuickBooks Desktop has no native undo for an import, so back up your company file first and restore it if needed. In QuickBooks Online, delete the imported records before importing again, because a second import adds records instead of overwriting them and creates duplicates.
For import and export work, QuickBooks Online’s Import Data wizard supports fewer data types and less custom field mapping than Desktop’s Advanced Import, and several imports depend on your subscription tier. Accountants running heavy data migrations sometimes prefer Desktop for that reason.
AI-triaged.
Human-solved.
Instant QuickBooks diagnostics, then a certified ProAdvisor takes over live.
first-call fix
match time
live coverage